
One of the benefits which comes with a Managed Instance is having backups taken care of for you. That also includes restores. Particularly useful is a one-click (ish) restore for a specific point in time.
Restoring a database is as easy as creating a new database, as its part of the same workflow.
From the Managed Instance resource in the Azure portal we have the ‘New database’ option. Once the Basics have been entered we can move to the ‘Data source’ tab where we have the option for a Point-in-time restore:
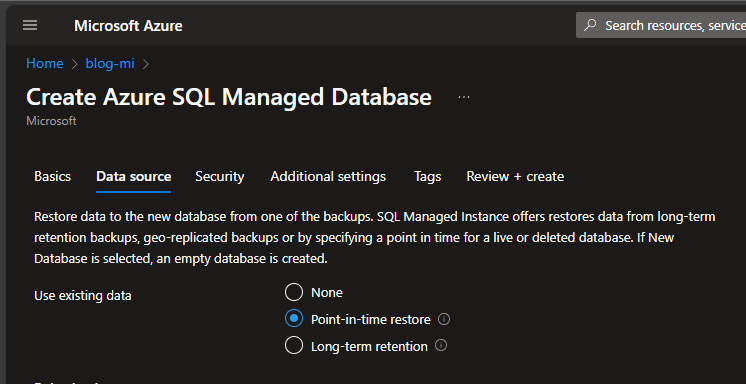
This allows us to select a Managed Instance, the database which resides on it, and what point to restore from. It really is this simple:

Once the remaining options are reviewed, the database will be restored onto the instance to the chosen point in time.
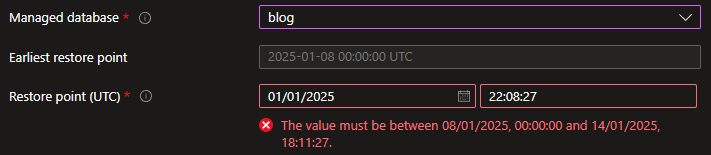
The timeframe available will depend on your retention period, but it’ll let you know what the range is if you veer outside:
That’s not all though.
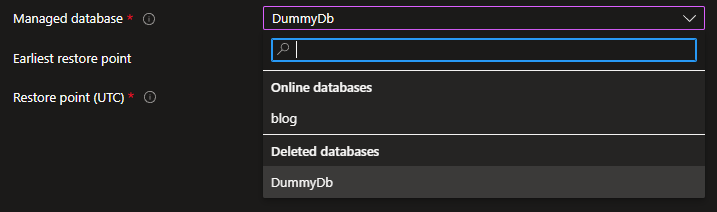
As long as you’re within your retention period, you can also restore from a database which has been deleted. When selecting the database you’ll see a section for Deleted databases as well as the Online databases:
One thing we can’t do with the restore however is to overwrite an existing database. A database name must be unique within the Managed Instance. If you want to do this you need to firstly remove the current database, and then restore the deleted database from a specific point in time.
That’s all there really is to it. There are a variety of configuration options when creating a new database, but restoring to a specific point in time really is just a few clicks.
If you want to give it a try yourself, try out the free Managed Instance offering.

2 replies on “Simplicity of Point-in-Time Restores in Managed Instances”
[…] Andy Brownsword points and clicks: […]
[…] few weeks ago I demonstrated the simplicity of performing point-in-time database restored in Azure Managed Instance. Whilst that has a lovely front-end, it can be just as easy with a proc call on your traditional […]