
If you haven’t seen or used Markdown before, it’s a simple way to annotate plain text in a way which indicates formatting by using specific characters. This means that you can format your text as you’re typing rather than scrolling through countless options in a visual editor such as Word.
Personally I find markdown so useful for getting ideas down to craft documents. I’ve used it for system documentation, taking notes during meetings, and most importantly of all – all of my posts for this blog are written using Markdown!
Here’s a sneak peak of how this post looks as I’m writing it:

This is designed as a brief primer for Markdown and a reference for more common and widely implemented styles to get folks started.
Getting started
The first thing we’ll need to get started is a markdown editor. These will transform the text we’re writing into rendered markdown. There are a number of these out in the wild – personally I use Visual Studio Code on a desktop but there are also web based options such as Dillinger and paid alternatives such as Typora.
For the examples below I’ll be using Visual Studio Code but you will have similar experiences with other tools. In VS Code when we create a new file we can choose the Markdown language out of the box:

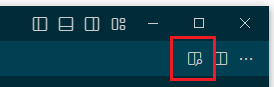
Markdown editors typically come with a preview function so you can see a formatted version of your document. This will be the default view in some cases (like Dillinger) and in VS Code we have an option to show the preview in the top right of the window:
That’s enough of a warm up, let’s start looking at some actual markdown.
Markdown reference
We’ll start off with the main structure of our documents which will be the headings. Multiple layers of headings can be created to help section our content, such as the examples below:
# Heading level 1 (e.g. Title)
## Heading level 2 (e.g. Sections)
### Heading level 3 (e.g. Subsections)
Next up we’ll look at some common formatting tools to help structure and present our content. This will include simple formatting such as bold, structuring content with bullets and quotes, and horizontal lines to break up sections:
**Bold text**
_Typical italic_ (or *alternative italic*)
***Bold and Italic combined***

- Bullet item 1
- Bullet item 2
- Bullet item 3

> Quotation

---
(horizontal line above)
Now we’ve got plenty of options for the text, so it’s time to add a bit more content into the document. For this we could look at including links, images and tables like this:
[Link text](http://myurl.com/)

|Col|Col2|Col3|
|---|---|--|
|Text|Value|etc|
Finally for those of us who produce more technical content Markdown also supports code snippets. We can provide both inline (unformatted) text as part of our writing, or we can choose to include blocks of code:
Inline `unformatted` text

```sql
SELECT *
FROM dbo.MyTable;
```
It’s worth mentioning here that the code blocks included within markdown will usually get rendered with syntax highlighting present to help with readability. The language can be added after the opening dashes such as sql in the example above.
So with all of that covered let’s take a look back at the screenshot we started with where I was creating this post and see if the structure resonates a little more now:

Additional benefits
Markdown is great for taking notes, but there are some additional benefits which I thought it was worth pointing out:
Firstly, using markdown as documentation compliments source control systems extremely well due to being plain text. It could be documentation for anything from API usage to support processes – but using markdown you can keep those version controlled alongside code changes so you can see who changed what and when. I’ve even had a repository created specifically for documentation previously.
Secondly, the formatted output produced by tools can be helpful to share with others. You can copy / paste straight out of some tools to pop it into your email or document editor of choice to have pre-formatted text. Alternatively you can even export from some tools straight into PDF format.
Now here’s the best part – using them together. For this very blog I have a repo which stores all of my posts which are written in markdown – it’s on Github. Wouldn’t you know it, even Github knows how to render markdown, so I can actually browse through my posts – image, links, code and all – right from the repository.
Wrap up
If you haven’t guessed by now, I absolutely adore markdown to help me get my thoughts down quickly. I use it daily and is one of the biggest helpers in me being able to produce the content I am for this blog.
I will note that markdown can be implemented slightly differently depending on the tool you’re using so you may see some minor differences if you try out different tools.
There’s lots of great resources out there for Markdown. There’s a sample when you land on Dillinger, more details on markdown within VS Code on their site, and an entire site you can dive into over at MarkdownGuide.org.
Have you tried markdown before or is it something you’d like to jump into having seen just how straightforward it can be here?
