
Uploading into a SharePoint list from an Excel document is straightforward to do, but populating multi-value fields isn’t so easy.
This can be solved using Power Automate and I wanted to share how easily it can be done (⚠️ Warning: lots of images ahead).
In brief, we’ll be doing the following:
- Take each record
- Split the field into an array
- Construct a SharePoint-friendly array
- Import the item into the list
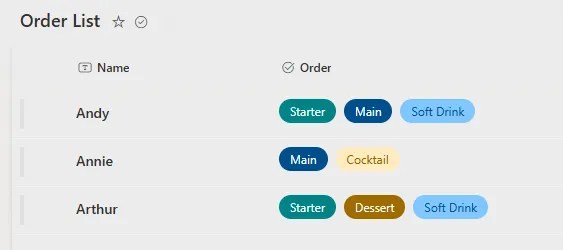
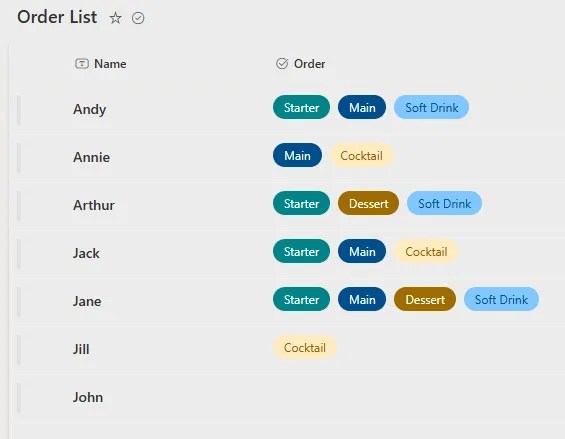
Let’s take an order list as our example where each person can select different elements of a meal:
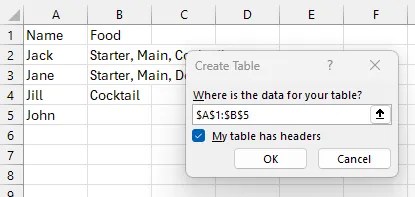
The remaining orders are in an Excel document which is also uploaded into SharePoint. We want to add these records into the list above.
A precursor is that we need to define a table in the Excel document. This is created via Insert > Table:
Now we’ll jump into Power Automate to create a flow for the document. We want an Instant Flow, either via Create > Instant cloud flow, or My flows > New Flow > Instant cloud flow.
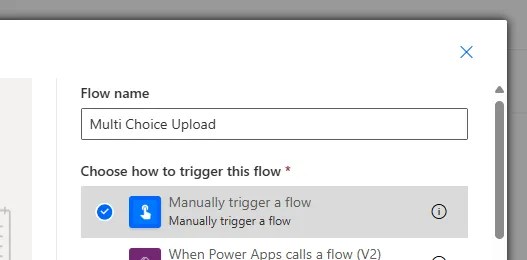
In this instance I’ll be creating the flow with a manual trigger so it can be ran when needed:
Building the flow
The first action in the flow is using Excel and the List rows present in a table action to read the document. Point it towards the table we defined in the document:

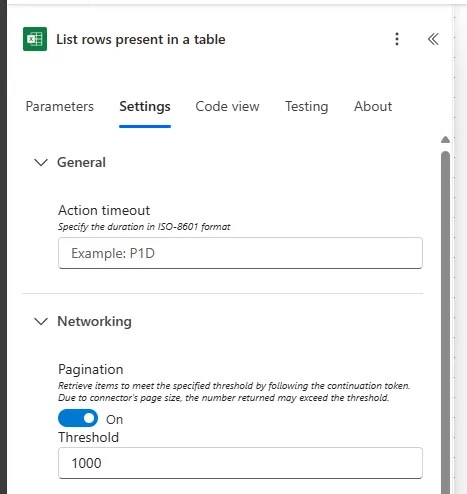
💡 Bonus tip: by default this will only read the first 256 records in the table. For larger documents head into the settings and enable pagination with a higher threshold:
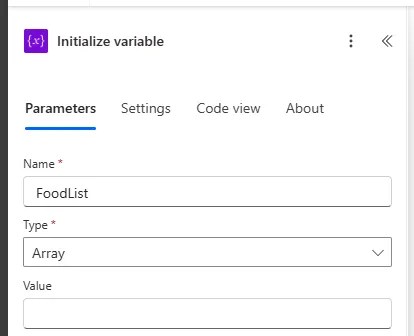
We need an array variable which we’ll use to store the list we want to upload into SharePoint. The Initialize variable action will declare that:
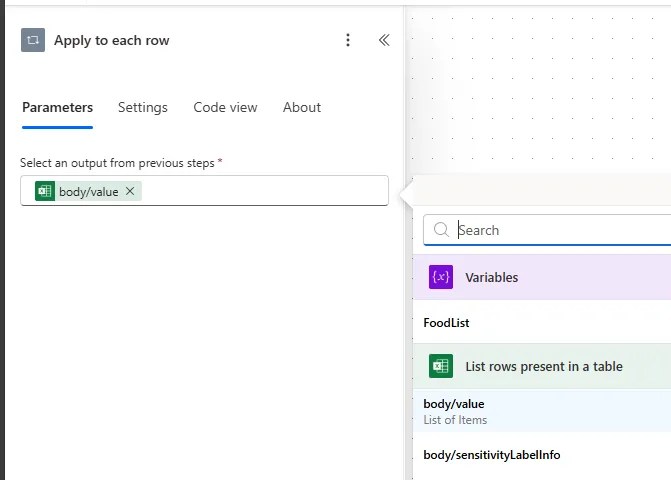
Now we need our first loop. This is to iterate over the records in the Excel document using the output from the earlier listing:
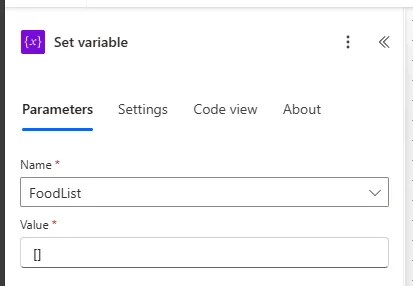
To start the loop we have a couple of housekeeping bits we need to do. Firstly use a Set variable action to clear the array variable so each record starts fresh:
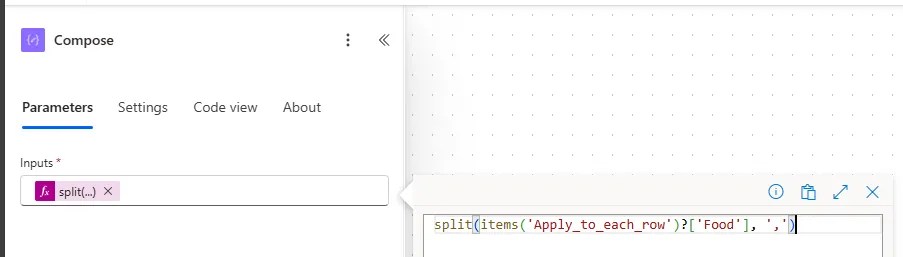
After that we use the Compose action to take the item list from the source record and split it into an array ready to process:
With those complete we can now start to build the list formatted correctly for SharePoint. To do this we’ll use another loop (Apply to each) against the output from the Compose action above:
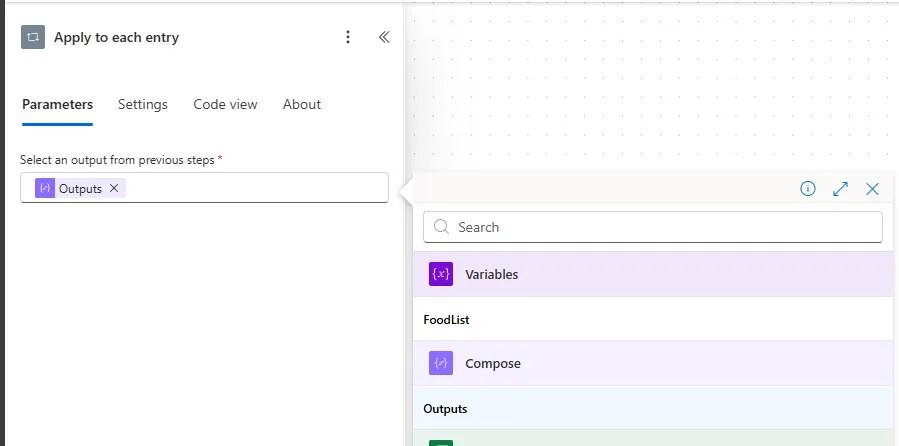
There’s only one item in this loop, and its where the real magic happens. Here we populate the array in a SharePoint-friendly format ready for upload.
We use the Append variable action to wrap each of the items using a specific format which will appease the SharePoint overlord:

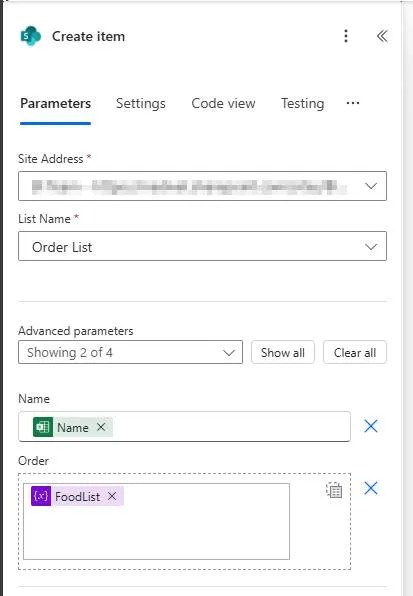
Finally we wrap up the flow we have a SharePoint Create item action which will add to the list. For the multi-value field you need to hit the Switch to input entire array option and we can then use our well-formed array from above:
With everything complete it would look a little something like this:
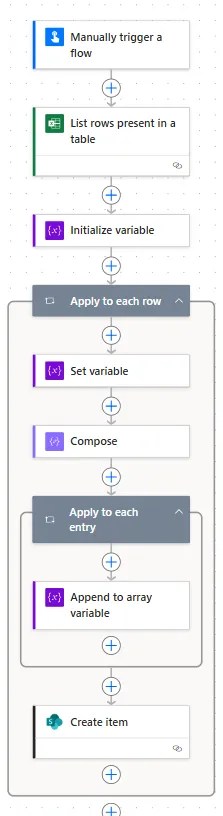
Save it, test it, and all being well you should have the new entries in the list in no time:
Wrap up
Regular imports from Excel to SharePoint don’t handle multi value fields. Instead you’ll find the whole field is imported as a single text value. In this post we’ve seen how to solve this with the use of Power Automate.
This process takes each record, splits the multi-value field, and reconstructs it in a SharePoint-friendly format. We can then simply add the record with our well-formatted array.
The flow looks a lot more work than it really is once you know how to format the array correctly.

2 replies on “Using Power Automate to Upload Multi-Value Fields in SharePoint”
Excellent writeup with the explanation. I tried to check with few more other presenters but couldn’t understood. Your is simple and easy to understand. I am learning via examples only.
Thanks for the feedback, Praveen. Glad you found the post helpful!