
Last week we looked at utilising Teams to make notifications more collaborative. This week I want to show how we can add more visual and interactive elements by adopting Adaptive Cards.
What are Adaptive Cards?
Adaptive Cards are structured messages which can be used across various Microsoft services as alternatives to plain text. They use JSON to define layout which is rendered into a simple but rich interface containing text, images and buttons, for example:

Adaptive Cards are supported in Teams, and the connector used for Logic Apps and Power Automate also supports sending Adaptive Cards.
Using these for notifications provides more structure than simple text. Using colours and icons makes them more visual and helps immediately differentiate between ‘information only’ and ‘it broke’ messages. This can be extended by allowing the user to submit a response directly from the card to feed back to the workflow where action can be taken.
The full documentation and a designer for Adaptive Cards can be found on the official site.
Sending an Adaptive Card
Before we can look at sending a card we need to create one. We use the GUI designer to do this. For our example we’ll create a failure alert with dynamically populated fields, and add an option to rerun the pipeline.
Here’s what our card looks like in the designer:
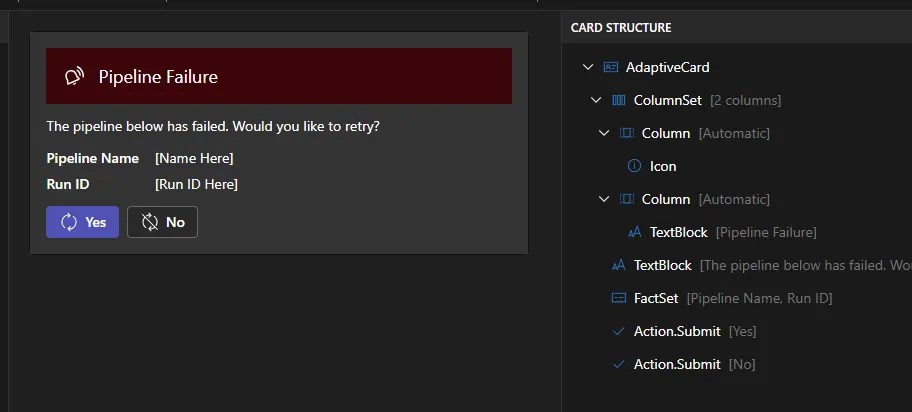
The designer also shows the JSON payload which we can use with any tool that supports Adaptive Cards. In this case we’ll use a Logic App approach like the previous post.
For the Logic App we’ll use the HTTP request trigger. The body will be slightly different from the previous example as we want to know about the Pipeline Name and Run Id to display, and the Data Factory name so we can rerun the failed pipeline:
{
  "type": "object",
  "properties": {
    "DataFactoryName": { "type": "string" },
    "PipelineName": { "type": "string" },
    "PipelineRunId": { "type": "string" }
  },
  "required": [
    "DataFactoryName",
    "PipelineName",
    "PipelineRunId"
  ]
}
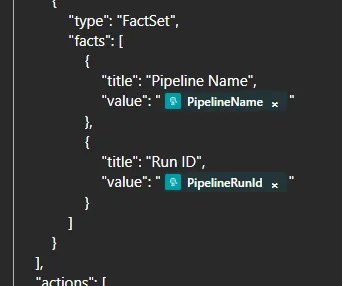
Within the app I prefer to start by initialising a variable to hold the message, which will be the output from the designer. This then needs to be adjusted to replace any placeholder text with the dynamic equivalents, like those from the trigger:
⚠️ Warning: You must also change the version attribute in the header to 1.5 as that’s the latest currently supported by Teams. By default the designer currently uses v1.6.
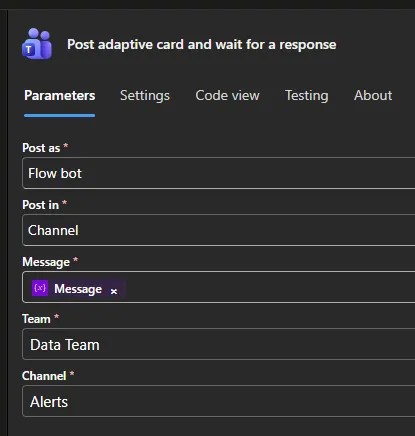
With the message defined, we can now use the handy action under the Teams connector – ‘Post adaptive card and wait for a response’. It’s configured like a regular post would be, and we can slot our variable into the Message field:
Support for Adaptive Cards in the connector differs based on the action. If you Post a message, it’ll wait for a response – even without any submission options. If you are replying or updating a message, it’ll just drop the message and continue the workflow.
💡 Note: If you post a message which times out, the body won’t be set and the messageId property unavailable, so you can’t reply to the thread to indicate it has timed out. Ensure timeouts are set appropriately under the action Settings if you rely on the workflow continuing.
With the Logic App complete, we’ll turn our attention to the Pipeline.
To call the app we’ll use a Web activity at the point of notification, and populate the body with a payload containing the system variables:
@concat('{
  "Message": "Test",
  "DataFactoryName": "', pipeline().DataFactory, '",
  "PipelineName": "', pipeline().Pipeline, '",
  "PipelineRunId": "', pipeline().RunId, '"
}')
Once complete if we run a test we’ll receive the prompt in Teams:
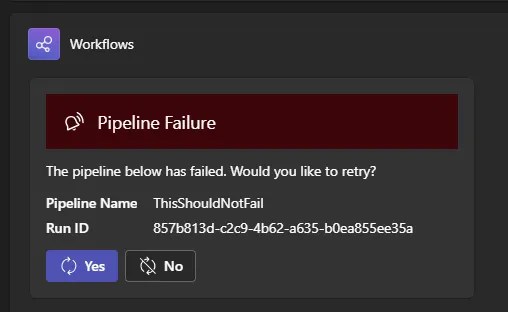
That’s instantly more engaging than a simple text prompt. Now we can build from this to respond to the chosen option.
Handling feedback
With the prompt above, selecting the the Yes or No option will return to the workflow. The body of the post action is populated with the submitActionId populated. We can react to these actions using a Condition or Switch, for example:
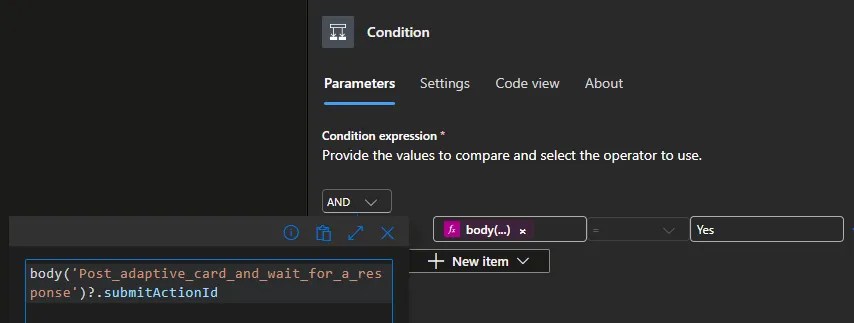
This allows us branching actions. This could include replying to the thread, creating a support ticket, or in this case we’re going to rerun the pipeline.
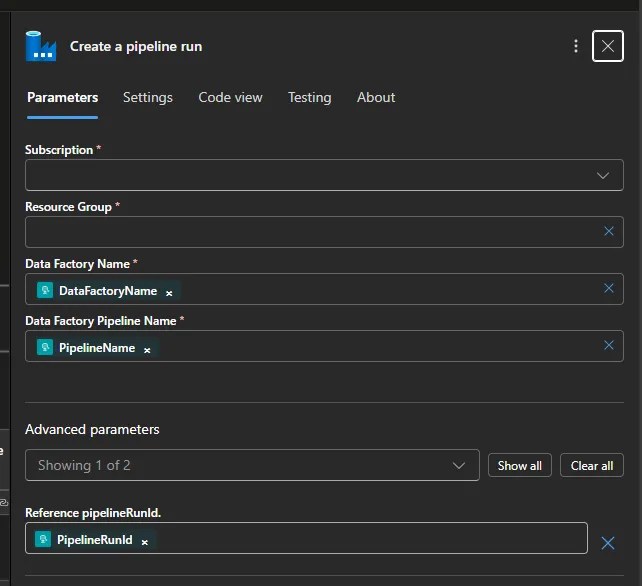
The Data Factory connector allows us to create a pipeline run and we’re able to set the Data Factory Name and Data Factory Pipeline Name based on the trigger details.
💡 Note: In this example we’ve only provided the Data Factory name and Pipeline name in the trigger payload. Those values are available as system variables. If you want to dynamically inject the Subscription and Resource Group you’d need to use an alternative such as Global Parameters.
We’re also going to use the Advanced Parameters for the task here. By providing the Run Id for the failed pipeline, it will restart it with the same parameters that were used previously. This avoids us trying to dynamically pass and parse parameters from the trigger:
That’s all there is to it. Personally I’d also reply with confirmation whichever option is chosen – especially if there’s any other additional logic in the workflow – to confirm that the app hasn’t timed out or failed at any point.
Wrap up
In this post we’ve extended what we started last time. Instead of simple Teams notifications we used Adaptive Cards to provide a richer and more interactive experience. Logic Apps lend themselves well to this due to the dynamic payloads they can receive and act on.
We’ve looked at designing cards, sending them through the workflow, and how the flow can react to their responses. This elevates a simple notification to a point of engagement, enabling actions such as raising tickets, or rerunning the pipeline can be triggered directly – without the need to jump between portals and tools.
By treating alerts as workflows rather than fire-and-forget messages, using a collaborative tool like Teams can become a powerful operational interface.

One reply on “Elevating Teams Notifications using Adaptive Cards”
[…] Andy Brownsword creates a card: […]